

Learn to make selfmade cake pops fully from scratch, with no field cake combine or canned frosting. Mix selfmade vanilla cake and vanilla buttercream and dip in white chocolate for a candy deal with youngsters (and adults, too!) at all times go loopy for. Watch the video tutorial for all my greatest shaping suggestions.
See my chocolate cake pops recipe, too.

I initially printed this recipe in 2015 and have since added new images and a video.
Have you ever ever seen a toddler peering into the meals show case at Starbucks? I’m not an skilled, however I’m keen to guess that 9 instances out of 10, the kid will ask for a cake pop. That is positively the case with my very own youngsters, anyway! There’s simply one thing so irresistible about these Starbucks cake pops—a wonderfully portioned deal with on a stick in eye-catching colours and shapes, topped with sprinkles. It’s exhausting to say no to one thing this tempting!
I first started making selfmade cake pops once I wrote Sally’s Sweet Dependancy. Actually, this recipe is printed in that e-book. I wished to share it on my web site as properly as a result of I’ve obtained a number of questions on making from-scratch cake pops.
One reader, Debby, commented: “Made 160 vanilla and chocolate cake pops for my daughter’s commencement celebration! They turned out nice! Many requested the place we had bought them. They seemed superb and tasted superior, too! Thanks, Sally, to your rolling recommendation, suggestions, and methods. It was good that you possibly can put together them forward of time and freeze them. ★★★★★”
One reader, Luisa, commented: “My first time making cake pops and so they had been good! My youngsters and their associates cherished them. This recipe goes to be a staple in our home for particular events. ★★★★★”

Why This Recipe Works
The key to profitable selfmade cake pops is the right cake-to-frosting ratio, which creates a clean, sturdy texture that’s straightforward to form and holds collectively fantastically.
One other key distinction? These are 100% selfmade; there’s no field cake combine or canned frosting. Which means a richer, extra flavorful cake pop the place you’ll be able to really style the distinction.
As we speak I’ll stroll you thru all my suggestions, tips, and secrets and techniques for crafting the right pop, plus the right way to make the vanilla cake and buttercream used inside. There’s rather a lot to cowl, so let’s pop proper to it. (Couldn’t assist myself!)
The right way to Make Home made Cake Pops
Since we’re leaving the field cake combine and canned frosting on the shop cabinets, we’ll must take additional time to prep each from scratch. Right here’s an outline of the method:
- Make a 1-layer vanilla cake and let cool.
- Make vanilla buttercream frosting.
- Crumble cake into frosting and blend.
- Roll the combination into balls.
- Dip in melted chocolate.
- High with sprinkles and let dry.
- EAT!
Make-Forward Tip: You can also make the cake upfront, as a result of it wants to chill fully earlier than you crumble it into the frosting. I at all times make the cake the evening earlier than, then end the cake pops the subsequent day.

My recipe for vanilla cake may be very easy. It’s principally a scaled-down model of my favourite vanilla layer cake. I encourage you to make use of the proper measurement pan for the cake. This cake is simply too massive for a typical 9-inch cake pan. You’ll want to make use of a 9-inch springform pan as a result of it rises fairly excessive. Or you should utilize an 11×7-inch pan as an alternative. A 10-inch springform pan would work as properly.
Apart from lollipop sticks, a mixer, and the proper measurement pan, you don’t really want a lot else to get began!
Then make the vanilla frosting. The distinction between this and frosting out of a container is the TASTE; you’ll be able to inform these cake pops are particular and it’s since you began with from-scratch parts. This frosting recipe yields *simply sufficient* to barely moisten the cake crumbs. Any greater than that and the cake pops can be greasy.
Now it’s time to crumble the cake and blend along with your frosting.
(Crumbling the cake into the frosting sounds tremendous bizarre when you consider it and that’s precisely what cake pops are—tremendous bizarre when you consider it. It’s cake and frosting combined collectively to kind a truffle-like ball. Pop a stick in it and dunk into coating. Yep, it’s weirdly scrumptious and superior and it is advisable embrace it.)

As soon as the 2 are combined collectively, it’s time to roll the combination into balls.

3 Success Suggestions for Shaping & Dipping Cake Pops
Success Tip #1: It’s simpler to roll the cake + frosting combination into completely spherical balls if it’s chilly. So what I do is roll the balls proper after the 2 are combined collectively. They’re fairly misshapen as a result of the cake + frosting combination is tremendous moist—and at room temperature. Chill the balls within the fridge for at the very least 2 hours. After that, give them one other fast roll to clean out the perimeters. Once they’re chilly, they’re simpler to clean out and kind completely spherical shapes.
Now let’s dunk! You possibly can dip the cake balls in melted white chocolate, which is what I choose for the very best style, however that stuff is fairly costly. And also you want quantity for all 40 cake pops! If desired, you should utilize sweet melts/sweet coating as an alternative.
Success Tip #2: To make sure the cake ball stays safe on the lollipop stick, dip one finish of the stick into the coating first (nearly 1/2 inch down). Then insert the coated finish into the middle of the cake ball. This helps the cake ball adhere to the lollipop stick.


Success Tip #3: The easiest way to permit the coating to dry and set—with out ruining the superbly spherical cake pop—is to position them right-side-up in a big styrofoam block or perhaps a field. I used a field, as pictured under, for this batch. I simply poked little holes into it.
Straightforward and low-cost:


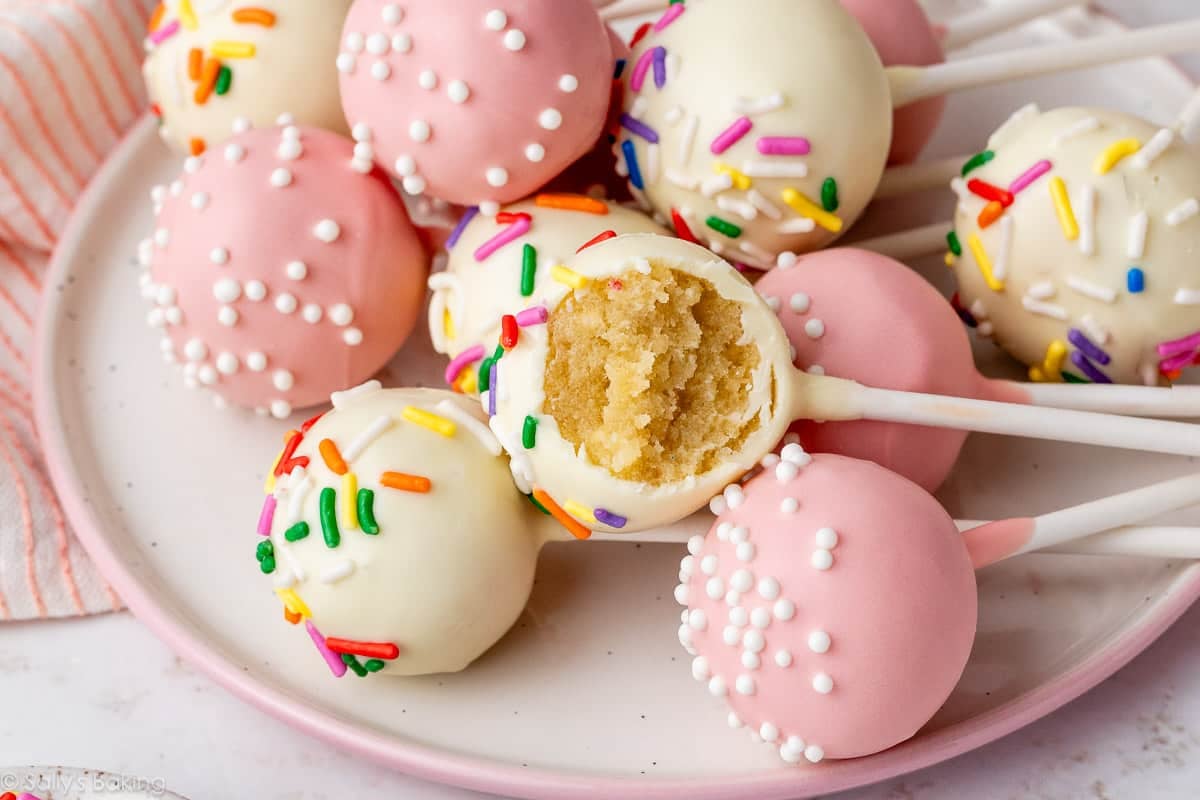
In case you’re topping with sprinkles (at all times beneficial!), add them now earlier than the chocolate units. I used rainbow sprinkles on the white chocolate and white nonpareils on the sunshine pink-tinted white chocolate (like Starbucks!).
Cake pops dry/set inside an hour or so.
Cake Pop FAQs
Cake pops are a really perfect celebration-worthy deal with to make forward of time as a result of they freeze fantastically. I merely freeze them in a big zip-top freezer bag or freezer-safe container after they’ve totally dried. They’ll keep within the freezer for as much as 6 weeks, then thaw them in a single day within the fridge.
Tinting the coating brings a enjoyable POP of coloration! I normally stick to only white + one different coloration. Once more, you should utilize coloured sweet melts for the coating or you’ll be able to tint the white chocolate with gel meals coloring. Then after all you’ll be able to combine up what sprinkles you utilize!
Take a look at my recipe for chocolate cake pops right here. You may also change up dunking in white or darkish chocolate.
In case your cake pops have some cracks on them, the melted chocolate might have been too sizzling. Let the melted chocolate or sweet coating sit for five minutes to barely settle down earlier than dunking the chilly cake balls into it. That normally helps!
Description
Home made vanilla cake pops with vanilla buttercream from scratch—no cake combine or canned frosting! Comply with my thorough directions, suggestions, and video tutorial for greatest outcomes.
- Preheat oven to 350°F (177°C). Grease a 9-inch springform pan.
- Make the cake: Whisk the flour, baking powder, baking soda, and salt collectively in a medium bowl. Put aside. Utilizing a handheld or stand mixer fitted with a paddle or whisk attachment, beat the butter and sugar collectively in a big bowl till creamed, about 3 minutes. (Right here’s a useful tutorial should you want steerage on the right way to cream butter and sugar.) Add the egg and vanilla extract and beat on excessive pace till mixed. Scrape down the underside and sides of the bowl as wanted.
- Add the dry components and milk to the bowl with the moist components and blend on low pace till mixed. Give the thick batter a fast stir with a spatula to make sure there aren’t any massive lumps on the backside of the bowl. Pour and unfold the batter evenly into the ready pan. Bake for 30–36 minutes or till a toothpick inserted within the middle comes out clear. If the highest begins browning too rapidly within the oven, loosely tent with a chunk of aluminum foil.
- Permit the cake to chill fully within the pan set on a wire rack.
- Make the frosting: With a handheld or stand mixer fitted with a paddle attachment, beat the butter on medium pace till creamy, about 2 minutes. Add confectioners’ sugar, heavy cream, and vanilla extract and blend on low pace to mix. Enhance to excessive pace and beat for 3 full minutes.
- Crumble the cooled cake into the bowl on prime of the frosting. Ensure that there aren’t any massive lumps. Flip the mixer on low pace and beat the frosting and cake crumbles collectively till mixed.
- Scoop 1 Tablespoon (about 20g) of cake/frosting combination and roll right into a ball. Place balls on a lined baking sheet. Refrigerate for two hours, or freeze for 1 hour to set the form. Re-roll the chilled cake pop balls to clean out, if wanted. Place the tray again into the fridge, as you’ll solely work with a pair at a time.
- Soften the chocolate or sweet melts in a 2-cup liquid measuring cup (greatest for dunking!) within the microwave in 20-second increments, stirring after every increment, till melted and clean. You may also use a double boiler on the range, should you choose.
- Coat the cake balls: Take away simply 2 or 3 cake balls from the fridge at a time. Dip the tip of a lollipop stick about 1/2 inch into the coating, then insert the coated finish into the middle of the cake ball. Solely push it about midway via the cake ball. Dip the cake ball into the coating till it’s fully coated. Ensure that the coating covers the bottom of the cake ball the place it meets the lollipop stick. Very gently faucet the stick in opposition to the sting of the measuring cup to permit extra coating to drip off. Embellish the highest with sprinkles and place upright right into a styrofoam block or field (as defined within the weblog publish). Repeat with remaining cake balls, working with just some out of the fridge at a time. The cake balls have to be very chilly when dipping!
- Coating will set inside an hour. Retailer cake pops within the fridge for as much as 1 week.
Notes
- Make Forward Directions: I at all times make the cake 1 day forward of time. Cowl and maintain at room temperature. You possibly can retailer the undipped cake balls within the fridge for as much as 2 days or freeze them for as much as 6 weeks. Permit to thaw within the fridge, then proceed with step 9. You may also freeze the completed cake pops for as much as 6 weeks as soon as the coating has totally set. Thaw in a single day within the fridge.
- Particular Instruments (affiliate hyperlinks): 9-inch Springform Pan (a 10-inch springform pan or 11×7-inch pan will work, too) | Glass Mixing Bowl | Whisk | Electrical Mixer (Handheld or Stand) | Cooling Rack | Baking Sheet | Silicone Baking Mat or Parchment Paper | Glass Measuring Cup | Lollipop Sticks | Americolor Meals Coloring
- Coating: You need to use sweet coating/sweet melts, or chopped white chocolate. I sometimes use Ghirardelli model white chocolate melting wafers. Semi-sweet, bittersweet, or milk chocolate baking bars work, too. Coarsely chop the chocolate and place it in a microwave-safe bowl or glass liquid measuring cup, together with 1/2 teaspoon vegetable oil to assist skinny it out. Microwave in 20-second increments, stirring after every 20 seconds, till melted and clean. Preserve heat over a double boiler.